IoT - Raspberry Pi AirPlay
![]()
The Story
The Raspberry Pi is one of my favorite little pieces of tech in recent years. I run two Pi Zeros with an OTG-to-USB A with a USB-to-Ethernet adapter as my PiHole DNS Servers, a Pi 3 B as my OpenVPN server using PiVPN, and I’m building a backup solution for my virtual servers using a Pi and an external HDD. So today I was trying to listen to music in the kitchen while the Apple Homepod is in the living room. Usually it’s not a problem, but when my two kids are yelling at each other and playing it gets loud and hard to hear.
Enter the Pi with AirPlay. I have an old Kenwood stereo receiver that’s been in the garage for a year or so collecting dust. I’ve also got to Klipsch bookshelf speakers with the same problem. These were both Goodwill finds and couldn’t be passed up for their price. I didn’t want to buy a bluetooth speaker for the kitchen, and I’m sure as hell not going to buy another Homepod just for the kitchen. But, I had a Raspberry Pi 3 B+ lying around without a current purpose.
The Tutorial, AKA “Get on With It!”
Tools
- Raspberry Pi (I’m pretty sure any of them will work, but I used a 3 B+)
- MicroSD card (8GB minimum)
- Case
- Power supply for the Pi
- USB DAC (Optional)
- Speakers with 3.5mm jack
- Raspbian Buster Lite
Setting up the Pi
A Few things to note before we begin. This is for AirPlay, so I’m assuming you have an iPhone or iDevice with AirPlay compatibility. I followed the tutorial at PiMyLifeUp and the official Github page.
The first thing you need to do is install Raspbian to your MicroSD card. I won’t outline how to do that here, but I do recommend using BalenaEtcher to flash your MicroSD card. Once Raspbian is installed, sign in with the default username “pi” and password “raspberry”. Then run the following command to change some necessary options:
sudo raspi-config
You’ll be met with the Raspberry Pi configuration screen, allowing you to change most of the common settings.
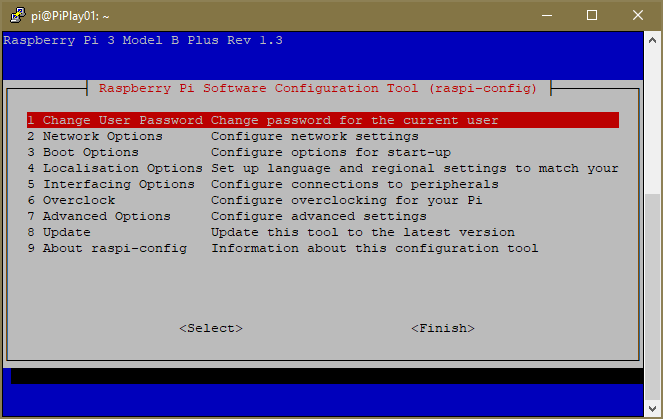
I suggest reading my post on a Basic Setup for your Raspberry Pi to change all the other settings, but the main setting we’re worried about is under “Interfacing Options”

Under “Interfacing Options” select “SSH”. Then select “Yes” for enabling SSH. This makes setting up all the other settings super easy.

Installing “AirPlay”
There are two ways to install Shairport-Sync, from the repos or from source. To install from the repositories, type the following:
sudo apt install shairport-sync -y
This installs all the dependencies and Shairport-Sync. If you want to build from source, continue reading below.
From Source
First, we need to install a few dependencies. Run the following commands:
$ sudo su
$ apt update && apt upgrade -y
$ apt install git xmltoman -y
$ apt install libssl-dev build-essential git autoconf automake libtool -y
$ apt install autoconf libtool libdaemon-dev libasound2-dev libpopt-dev libconfig-dev avahi-daemon libavahi-client-dev -y
Then, we need to install ALAC support if you want to play ALAC files. The following code will clone, change directories, setup autoconfig, config, make and install, and then make available the ALAC package. More info can be found on the Github page.
$ git clone https://github.com/mikebrady/alac.git
$ cd alac
$ autoreconf -fi
$ ./configure
$ make
$ make install
$ ldconfig
Running “sudo su” at the beginning means we don’t have to type “sudo” in front of all those “apt’s”. I’m lazy and would rather not have to do that. Next, we need to clone the files from Github and configure. Run:
$ git clone https://github.com/mikebrady/shairport-sync.git
$ cd shairport-sync
$ autoreconf -fi
$ ./configure --with-alsa --with-avahi --with-ssl=openssl --with-systemd --with-metadata --with-apple-alac
Now we need to actually make the application and install it.
$ make
$ make install
Wait for the magic to finish, and then enable it in Systemd:
$ systemctl enable shairport-sync
$ systemctl start shairport-sync.service
Now we can also make some changes in the config file.
$ nano /usr/local/etc/shairport-sync.conf
The most essential change in this file is the volume_range_db. Delete the two // in the front of the line. That’s the recommended setting from the Github page. I also changed the alac_decoder by first enabling it and then changing it to "apple". Lastly, I changed the name from %H to "Kitchen". save the file.
Disable the wifi power-saving options to eliminate any issues with wireless.
$ iwconfig wlan0 power off
Finally, we need to reboot the Pi for all the changes to take effect.
$ reboot
Tweaks
The built-in audio DAC is okay on a Pi, and using a set of computer speakers I had around for the initial test sounded fine. However, after hooking up the Kenwood receiver with Klipsch speakers, you could really tell the DAC wasn’t all that great. I added in a USB DAC I’ve had for years from a gaming headset. It’s a Plantronics USB DAC and works wonderfully. Here’s how to use a USB DAC.
First, we need to make sure the Pi can see it. Type the following to see it.
$ aplay -l
If your device is seen then you’re in luck! Next, we need to edit our alsa.conf file.
$ nano /usr/share/alsa/alsa.conf
Locate the following options and change them from 0 to 1 like the example. NOTE: I don’t know if it will always be 1 or not. It worked for me.
...
defaults.ctl.card 1
defaults.pcm.card 1
...
Finally, you need to reboot the Pi.
$ reboot
Conclusion
After switching from the onboard audio to the USB DAC, I am blown away by how awesome this turned out. We can now have podcasts or music in the kitchen while cooking, and it was cheaper than buying a bluetooth speaker with far better sound. If I were to build something like this from scratch, I’d honestly use a Pi Zero W with a HifiBerry DAC+ Zero or a Pimoroni pHAT DAC. A Full Pi 3 B/+ just feels like it’s overkill for what I’m using it for.